I was assigned a task where business requirements were to integrate HubSpot to Dynamics 365. Being a Dynamics’ folk, I was unknown to the term HubSpot itself and was also like other Dynamics’ enthusiasts who were also new to this term. Then during my research journey, I got to know that it is CRM like our Dynamics 365 CRM or like any other CRM which is present in the market. HubSpot has its two flavors Professional and Enterprise. Marketing Hub Professional and Sales Hub Professional is more advance than Sales Hub Enterprise and Marketing Hub Enterprise.
Since it was POC I don’t have HubSpot instance yet. This was the time when I realized that I should have source(HubSpot) instance first to integrate it with Dynamics 365. It should be my priority to get HubSpot instance ready before starting the actual work.
Here, are the steps to get your HubSpot instance ready.
#1: login to https://www.hubspot.com and on left top, click on Get HubSpot Free button.

#2: Click on Get free CRM

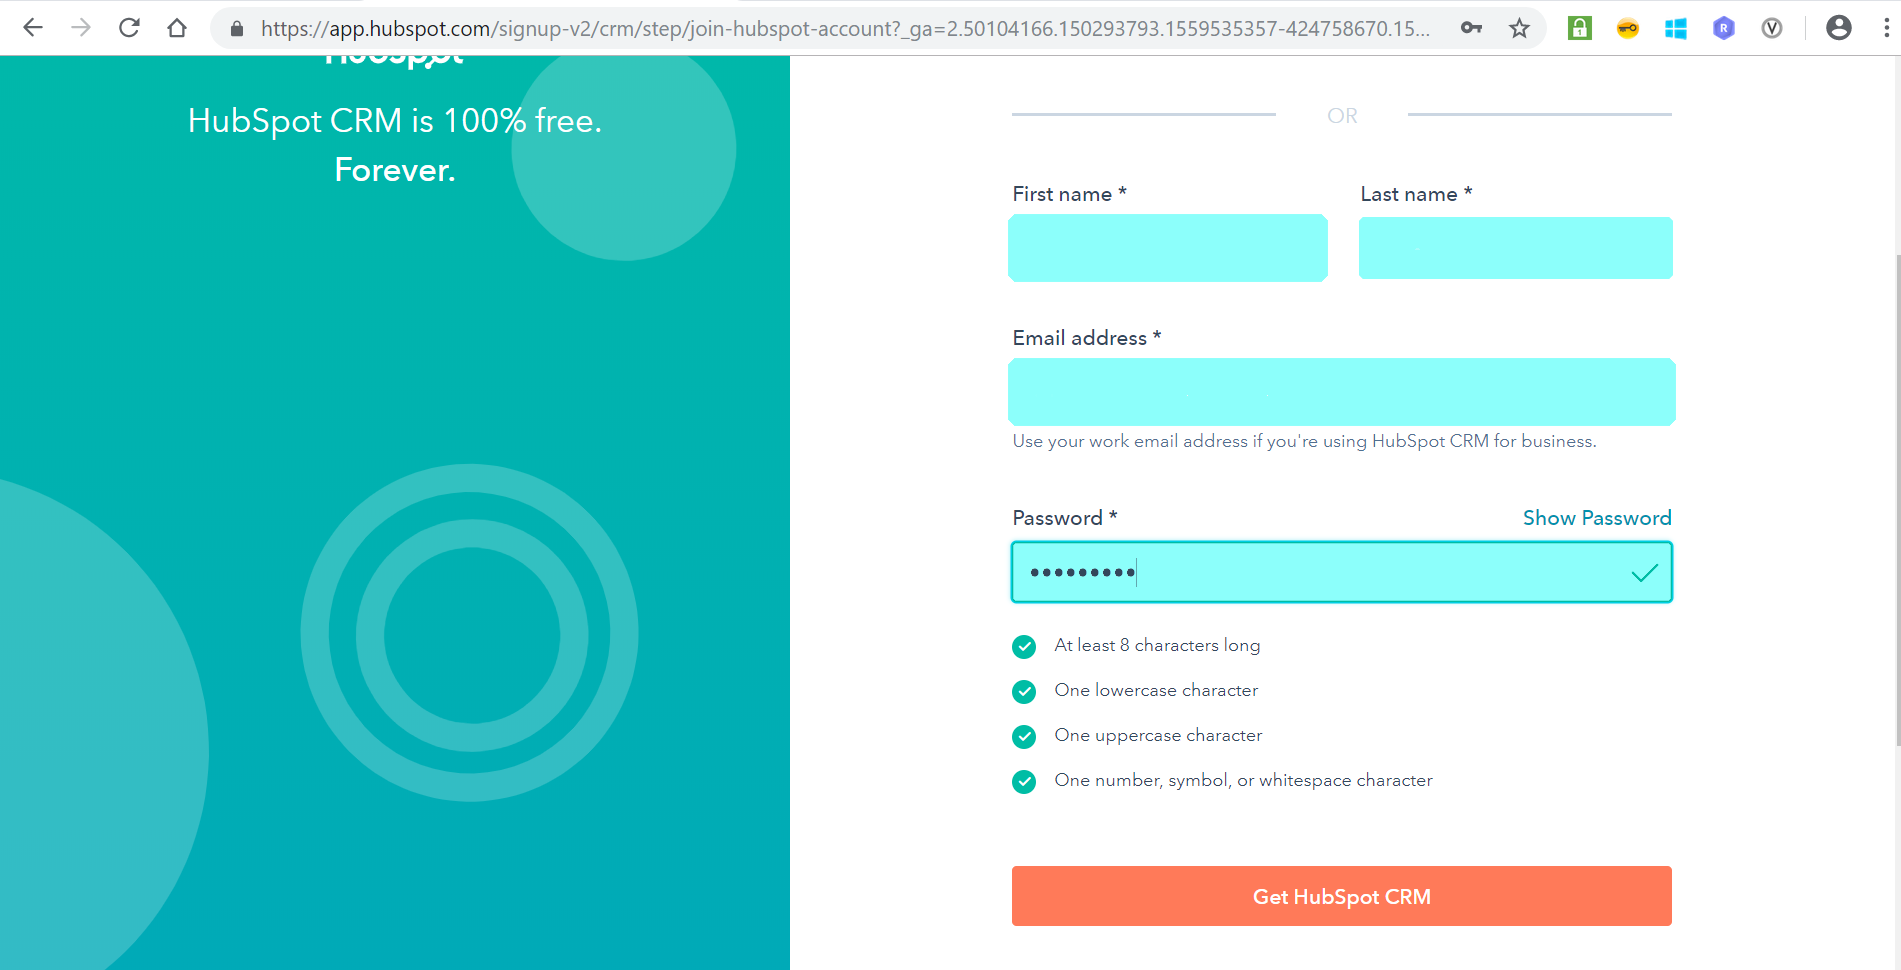
#3: Fill all the details which is required in below screen likewise: First name, Last name, Email address, Password. Post that, Click on Get HubSpot CRM
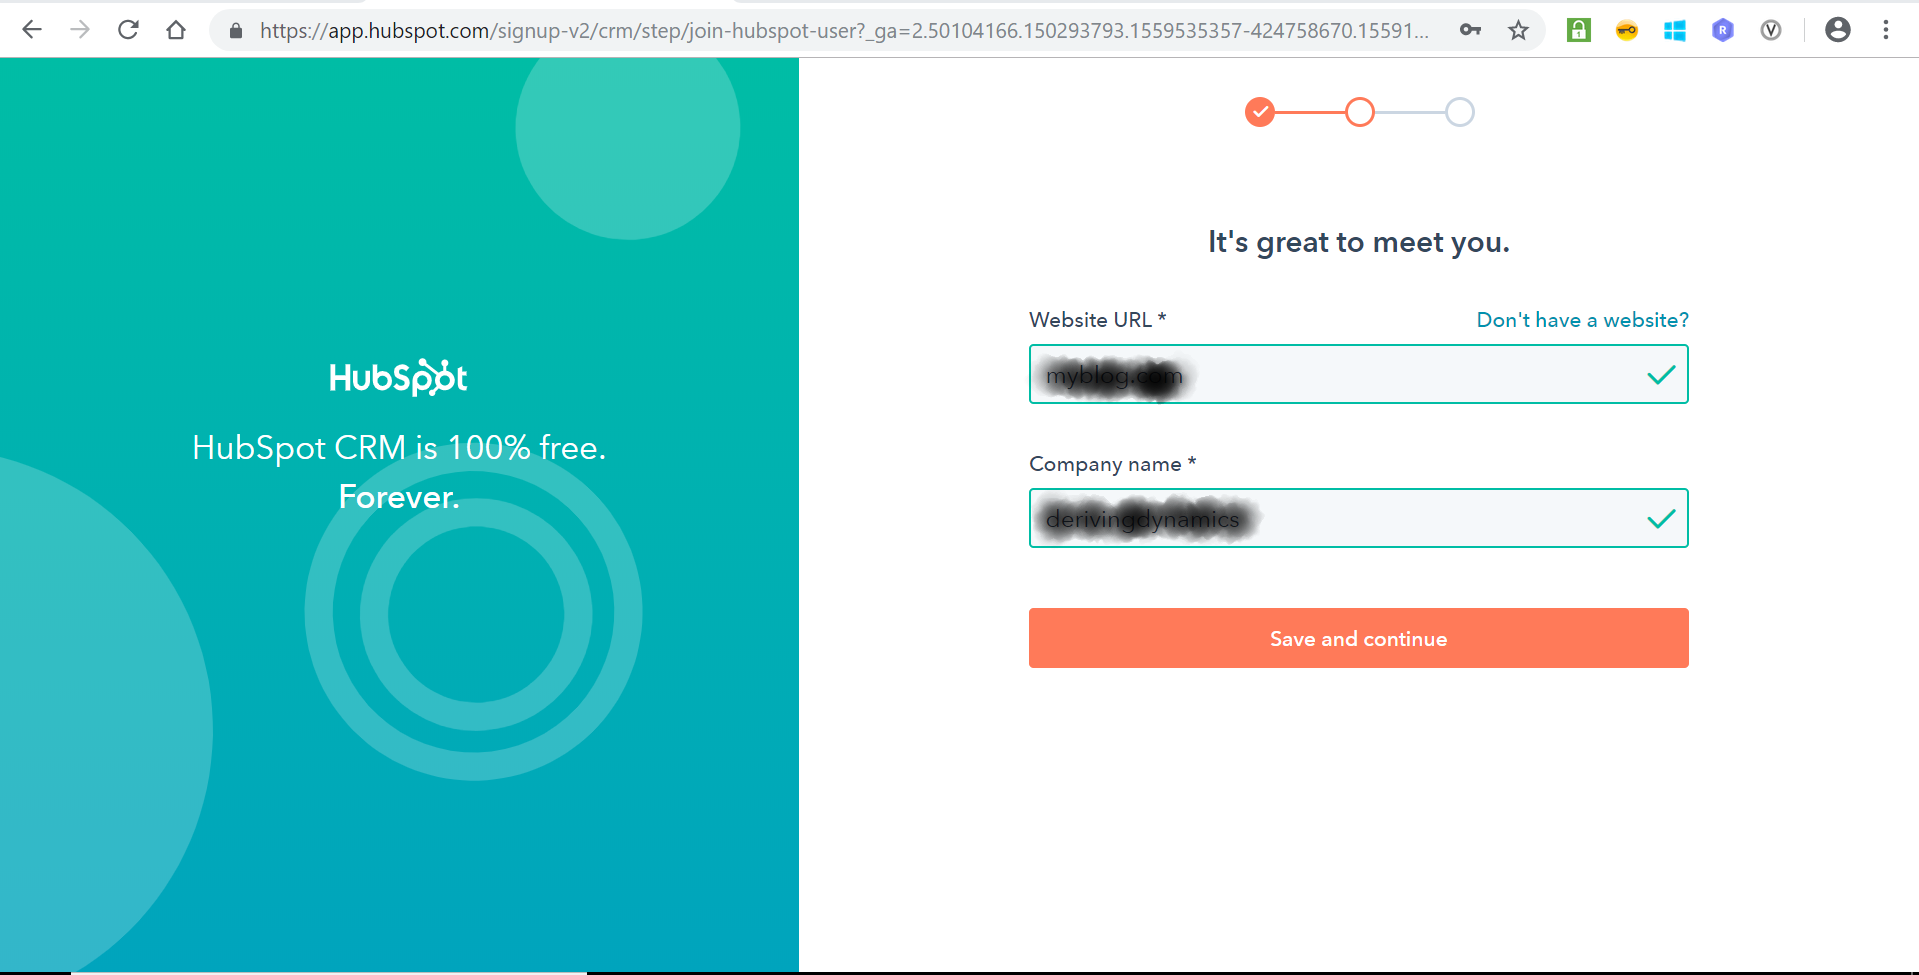
#4: Enter Website URL and Company Name and click on Save and continue.
Here, you are ready to go and to explore more.!

Since it was prerequisite to start with integration work. So, In my next blog series I have covered “How to integrate HubSpot to Dynamics using Zapier” click here
I am requesting to please be tuned for “How to Integrate HubSpot to Dynamics 365” using several other methods.
Hope it helps!